

Pick up a brand-new surfboard and run your hand across the deck — it’s smooth, glassy, and almost slippery to the touch. That’s a problem, because a slippery deck means your feet, knees, and chest have nothing to grip onto the moment you try to pop up. That’s where wax comes in. It’s a small detail that gets overlooked by almost every beginner, but it makes a bigger difference to your first few sessions than most people realize. Here’s exactly what it is, why it matters, and how to apply it properly.
Why Waxing Matters
A surfboard deck has no built-in grip on its own — the fiberglass or foam surface is naturally smooth. Wax builds up a layer of small, textured bumps across the deck that your skin can actually catch onto, whether you’re paddling, popping up, or holding a stance mid-ride. Without it, you’ll find yourself sliding around the board, struggling to hold position, and burning energy just trying to stay put rather than focusing on balance and timing.
Understanding Wax Temperature Types
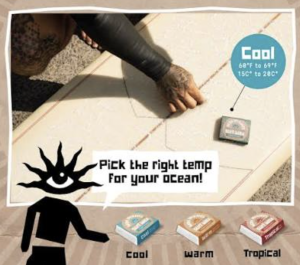
This is the part that trips up almost every beginner: not all surf wax is the same, and using the wrong kind for the water temperature will actually work against you.
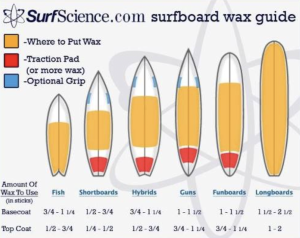
Wax is generally applied in two layers:
This second part matters enormously in Bali. Water temperatures here typically sit between 27°C and 29°C (roughly 81–84°F), which classifies as tropical/warm water. If you accidentally grab a cool-water or cold-water topcoat — which can look identical on the shelf — it will melt almost immediately in Bali’s warm water, leaving you with a greasy, slick deck instead of a grippy one. Always check the label specifically says “tropical” or “warm water” formula before you buy.
What You’ll Need
How to Wax Your Board, Step by Step
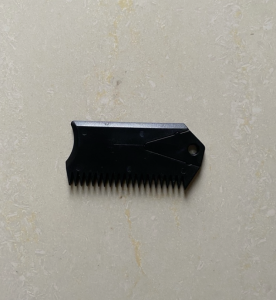
- Start with a clean deck. If this is a used board, scrape off any old, degraded wax first using the flat edge of your wax comb. Old wax that’s gone smooth and slick actually reduces grip rather than adding it, so it’s worth stripping it back to bare deck before starting fresh.
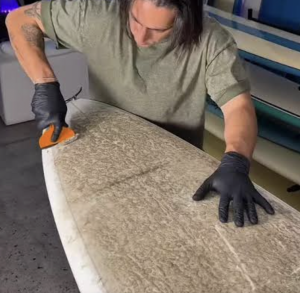
- Apply the basecoat first. Rub the basecoat bar firmly across the deck in a crosshatch (criss-cross) pattern — think of drawing a tight grid of diagonal lines in both directions. You’re aiming to build up small, raised beads of wax, not a smooth painted-on layer. Focus on the areas where your body will actually make contact: roughly the chest/paddling zone and the standing area where your feet will land.
- Layer the topcoat on top. Once the basecoat has formed a solid textured base, apply your tropical topcoat over it using small circular motions. This softer layer is what your skin will actually grip against, so build it up until you can feel a genuine texture rather than a flat, waxy film.
- Score the surface with your wax comb. Run the serrated edge lightly across the topcoat to rough up the surface and define individual bumps. This step makes a noticeable difference to grip, especially once the top layer starts to flatten from use.
- Add a traction pad if you want extra insurance at the tail. Many surfers apply an EVA foam traction pad over the rear fin box area instead of relying purely on wax back there. It gives your back foot a raised, tactile reference point — useful for knowing exactly where your foot is without looking down.
Maintenance: Keeping Your Wax Working
Wax doesn’t last forever. After a few sessions, the raised bumps flatten out from friction and heat, and grip starts to fade. When that happens, you don’t need to strip the board completely — a fresh topcoat layer rubbed over the existing base will usually restore traction. Use the comb to re-score the surface once you’ve reapplied.
Every so often (especially if the wax starts collecting sand, dirt, or feels gummy rather than textured), it’s worth scraping the deck back to bare board and starting over with a clean basecoat.
One more tip: don’t leave a waxed board sitting in direct tropical sun for long periods, like on a car dashboard or exposed on the sand. Bali’s heat will melt even tropical wax if it’s baking in direct sunlight, turning your carefully built texture into a soft, gummy mess.
A Quick Note on Wax Rash
If you notice red, irritated skin on your chest or the inside of your knees after a few sessions, that’s what’s known as “wax rash” — friction irritation from repeated contact with a waxed deck. A rash guard or thin neoprene top solves this easily and is worth having in your kit regardless, since it also protects against sun exposure during long sessions.
The Bottom Line
Waxing a board isn’t complicated, but it’s easy to get wrong if you’re not paying attention to temperature formulas or technique. Basecoat for structure, tropical topcoat for grip, a comb to maintain it — that’s the whole system. Get it right, and you’ll stop fighting your board and start focusing on what actually matters: catching the wave.
If you’re taking lessons with us, don’t worry about any of this on day one — every board we hand you comes properly waxed and ready to go. This guide is here for whenever you’re ready to take care of your own equipment.

Yosua is a surf enthusiast with over 5 years of chasing waves across Bali’s iconic coastlines. From West coast to East coast of Bali, he’s spent years exploring what makes Bali one of the world’s greatest surf destinations. Through Surf Journey Bali, Yosua shares honest guides, local tips, and surf travel insights to help both beginners and seasoned wave-riders make the most of their Bali surf experience.